Merging Records
Prerequisites
- Any security role that allows grants Read, Write, Append and Append To permissions for the entity to merge records.
How To Merge Records
You can merge records in the following views:
- Job results
- Ignored records
- Duplicates of a record inside forms
To Merge Records:
- Select the records you want to merge.
- In the header bar or by right-clicking the selection and opening the context menu, click Merge.
The merge popup will open:
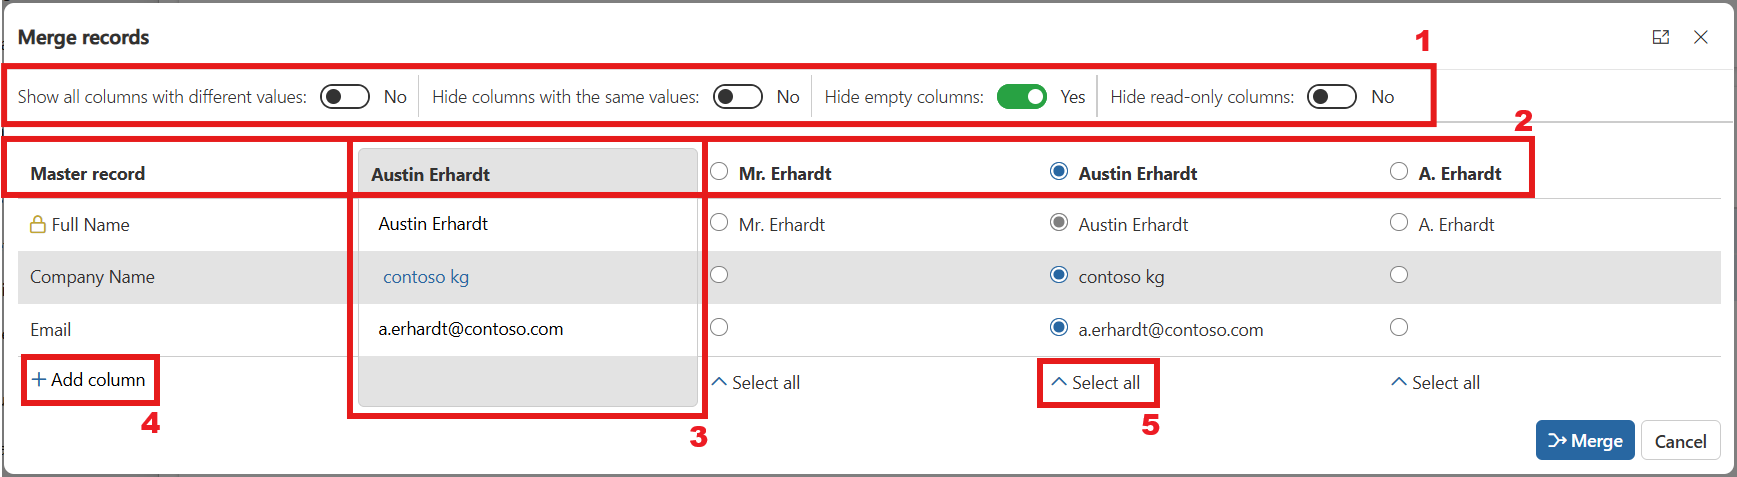
You can toggle display settings to show or hide columns, which affects both the merge preview and the Add column selector:
- Show all columns with different values: Adds/removes all columns where the selected records do not share the same value, excluding those that the user has manually added to the view.
- Hide columns with the same values: Hides/shows all columns where all selected records share the same value.
- Hide empty columns: Hides/shows columns that have no value in any selected record.
- Hide read-only columns: Hides/shows read-only columns (indicated by the icon). These cannot be changed during merge.
Choose the master record—the primary record that remains after merging. All other records will be deactivated and their status set according to the entity’s Merge Settings. Related records from non-master records will be reassigned to the master, except those explicitly excluded in the Ignore Relationships Merge Setting.
Displays the final values for each column in the master record after merge completion. You can:
- Select a value from any of the records for each column
- Manually edit the value directly in the preview
- To add a column: Click Add column and select a column from the list (hidden columns per your display settings won’t appear).
- To remove a column: Hover over its name and click the Remove (x) icon. Note: Removing a column means its data will not be included in the resulting master record.
Use this option to automatically select all data of the selected record.
Finalizing the Merge
- When ready, click Merge in the bottom right corner.
- Depending on the number of records and entity relationships, merging may take up to 2 minutes.
- You can close the merge window before completion, but no notification will be provided if the merge fails.
Troubleshooting
If the merge fails, refer to How to Identify and Ignore Relationships that cause Merge Errors.
Didn't find what you were looking for?
Our team is ready to support you - reach out anytime and we’ll make sure you get the help you need.